Wednesday, December 29, 2010
Bath Salts for Christymas!
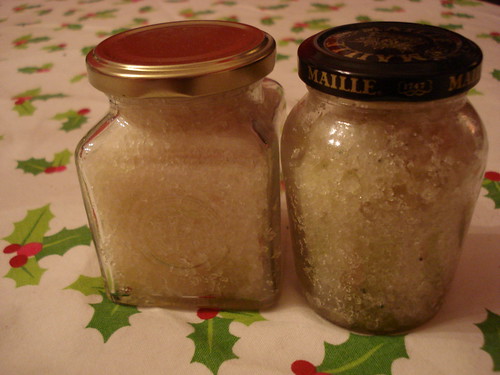
I made Bath Salts to give to my sisters, cousins and nieces for Christmas. I made them on Christmas Eve morning. It didn't take long, but here's my suggestion: warm the oil then take it off the heat and dump in the tea. The green tea kind of burned a bit. But it still smelled okay so I used it.
Thursday, August 12, 2010
Mary Janes or Irish Dancing Shoes?


Do these look like Mary Janes or Irish Dancing Shoes to you? It all depends on your point of reference. I gave these to my girlfriend Michelle at her baby shower and she immediately declared, "Oh! They're little Irish Dancing Shoes!" Tara and I looked at each other, smiled and said, "it's all on your point of reference." They really DO look like Irish Dancing Shoes, and it's so cute to think of them that way. I tried my best to get a good picture but sometimes it's hard when the item is black, so I had to do some modifications before posting here. They didn't take very long either. Well, an evening, so you tell me if that's long. Heh heh.
Giveaway from Icelandic Gardening, Knitting, Gradstudent Mom!
She's giving out a $40.00 online gift card to Loops! Check out her site for more information!
www.icelandicgardener.blogspot.com
www.icelandicgardener.blogspot.com
Tuesday, March 23, 2010
Girlie Moebius Cowl Pattern
This pattern was inspired by Haley Waxberg's Easy Moebius Cowl.
Girlie Moebius Cowl
1 skein Homespun Lion Brand Yarn or ~120 yds of another Chunky Yarn
47” US 10 Circular needle
Use the Cast On procedure as described by Cat Bordhi
http://www.youtube.com/watch?v=LVnTda7F2V4
Cast on 66 stitches.
Place a marker after you cast on and join. Be sure not to twist stitches.
One round is when the marker appears again on the top needle.
Knit four rounds.
Purl one round. Eyelet round: [P2tog, yo] repeat to marker. Purl 2 more rounds.
Knit four rounds.
Purl one round. Eyelet round: [P2tog, yo] repeat to marker. Purl 2 more rounds.
Knit four rounds.
Purl one round. Eyelet round: [P2tog, yo] repeat to marker. Purl 2 more rounds.
Knit four rounds.
Picot edge bind off
Remove stitch marker.
Cast on two stitches, using the cable cast on.
Knit one stitch, then knit a second stitch. You will have two stitches on your right needle.
Cast off the first stitch by pulling it over the second stitch. You have now cast off one stitch.
Repeat this and cast off four stitches in total.
Then repeat from the beginning, by casting on two stitches using the cable cast on. Cast off four stitches and repeat until you are at the end of the round and all stitches are cast off.
Cut the yarn and pull through, weave in the ends and you’re done!
Two Black Cowls
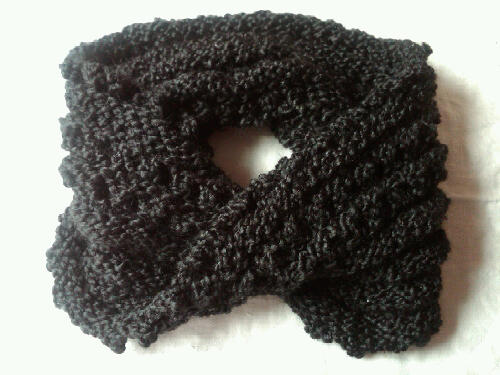
I think I'm only keeping one of these. I like my neck to be warm when it's super cold outside and I'm walking our dog, McCool or if it's just cold and I'm out.
They're made of acrylic Homespun Lion Brand yarn. It's cheap, but it's pretty soft really and washable. Since I wear it often, I like that it's washable. Also, wool that close to my skin tends to be itchy to me. I know that's harsh when I'm a knitter and all, but there it is.
These were super easy the Black Mobius Cowl is the one that looks like it's twisted, which it is. I altered the original pattern by adding an eyelet and a picot edge to make it more girly. It was just too bland for me. I like texture and knobby things on my knitted stuff.
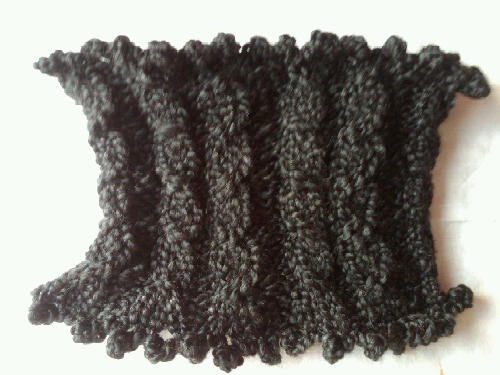
The second one is my own design, and I added a picot edge to that one too. It might fit someone with a long smallish neck, but it does actually go over my big head, so you could wear it too! It's actually a black black, and just appears grey black because of the glare from the camera. It's hard to take pictures of black knits just like it's hard to take a picture of a black dog.
They're made of acrylic Homespun Lion Brand yarn. It's cheap, but it's pretty soft really and washable. Since I wear it often, I like that it's washable. Also, wool that close to my skin tends to be itchy to me. I know that's harsh when I'm a knitter and all, but there it is.
These were super easy the Black Mobius Cowl is the one that looks like it's twisted, which it is. I altered the original pattern by adding an eyelet and a picot edge to make it more girly. It was just too bland for me. I like texture and knobby things on my knitted stuff.
The second one is my own design, and I added a picot edge to that one too. It might fit someone with a long smallish neck, but it does actually go over my big head, so you could wear it too! It's actually a black black, and just appears grey black because of the glare from the camera. It's hard to take pictures of black knits just like it's hard to take a picture of a black dog.
Tuesday, January 12, 2010
Peruvian Hat Pattern
Someone on Ravelry asked me for the pattern for this hat. It was originally designed by Plymouth Yarn, I altered it for working in the round. It's easier that way, then you just weave in ends instead of sewing up seams. Plus it makes the hat more comfortable. So here it is. 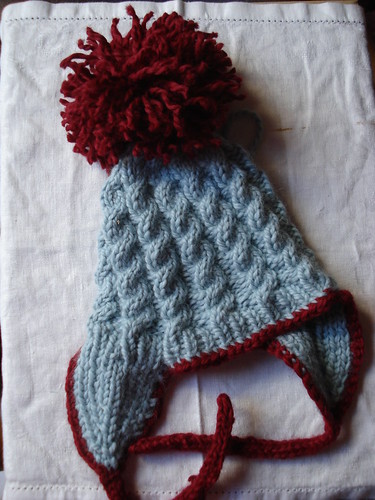
Materials
Yarn
1 – 100g hank of Baby Alpaca Grande Main Color
1 – 100g hank of Baby Alpaca Grande Accent Color
Needles
Size 10, or those needed to achieve gauge
Gauge 14 stitches = 4” in st st on size 10 needles
Cable (CB4): Slip the next 2 sts to a cable needle and hold in back, knit the next 2 sts, knit the 2 sts from the cable needle.
M1P: Pick up the bar between the last stitch worked and the next stitch, place it on the needle and purl into the back of it to make 1 purl stitch.
M1K: Pick up the bar between the last stitch worked and the next stitch, place it on the needle and knit into the back of it to make 1 knit stitch.
Hat
Make 2 earflaps:
With size 10 needles, cast on 3 sts. PURL 1 ROW
Begin pattern:
Row 1 (RS): K1, M1P, k1, M1P, k1: 5 sts.
Row 2: P1, k1, p1, k1, p1
Row 3: K1, p1, M1K, k1, M1K, p1, k1: 7 sts
Row 4: P1, k1, p3, k1, p1
Row 5: K1, p1, k1, M1P, k1, M1P, k1, p1, k1: 9 sts
Row 6: *(P1, K1), repeat from * across, end p1
Row 7: K1, p1, k1, p1, M1K, k1, M1K, p1, k1, p1, k1: 11 sts
Row 8: (P1, K1) twice, p1, (k1, p1) twice
Row 9: K1, p1, k1, p1, k1, M1P, k1, M1P, k1, p1, k1, p1, k1: 13 sts
Row 10: *(P1, K1), repeat from * across, end p1
Row 11: K1, p1, k1, p1, k1, p1, M1K, k1, M1K, p1, k1, p1, k1, p1, k1: 15 sts
Row 12: (P1, K1) 3 times, p3, (k1, p1) 3 times
Row 13: (RS) (K1, p1) 3 times, k3, (p1, k1) 3 times
Row 14: Repeat Row 12
Row 15: Repeat Row 13
Row 16: Repeat Row 12
Row 17: Repeat Row 13
Row 18: Repeat Row 12.
Cut yarn and set aside on spare needle or holder. Make a second earflap to match.
Body of Hat: Using circular needles, slip the two earflaps onto the circular needles. With RS facing, starting at center back, cast on 7 sts, pickup and purl 15 sts from 1 earflap, cast on 15 sts, pick up and purl 15 sts from the other earflap, cast on 8 sts, place marker and join. 60 sts. [Note: This is a small hat, if you have a larger head, you can add more stitches in between the earflaps, just add them equally in sets of 6]
Row 1: *(K1, p1), repeat from * until marker indicates end of round.
Repeat (Row 1) 5 more times
Set up cables:
Row 1: *(P2, k4), repeat from * until marker
Row 2: repeat row 1
Row 3: *(P2, CB4), repeat from * until marker
Row 4: Repeat Row 1
Row 5: Work Rows 1-4 until 6 cable twists total have been made, end with a Row 4.
Decreases
Dec row 1: *(P2tog, k4), repeat from * until marker
Dec row 2: *(P1, k4), repeat from * until marker
Dec row 3: *(P1, slip 2 sts to cable needle, hold in back, k2 sts, k2tog from cable needle) repeat from * until marker
Dec row 4: *(P1, k3) repeat from * until marker
Dec row 5: *(P1, k1, k2tog) repeat from * until marker
Dec row 6: *(P1, k2tog) repeat from * until marker
Dec row 7: K2tog until marker
Trim: Using accent yarn, pick up four stitches at earflap end and make an I-cord. Repeat for other earflap.
Using a crochet hook, single crochet in each stitch across from one I-cord to the other, cut yarn and repeat for the other side.
Make a pom-pom for the top, and weave all ends in to finish.
Alternate to I-cord: make 2 braids: Take 5-6 yds of yarn, pull apart into 2 plies. Using 1 ply and size C crochet hook, chain 32. Turn, working into the 3rd chain from hook, work 2 DC into first chain, work 3 DC into net chain and every following chain. Fasten off and attach to earflap.
Subscribe to:
Posts (Atom)
