Friday, May 29, 2009
Whoopie Pies!
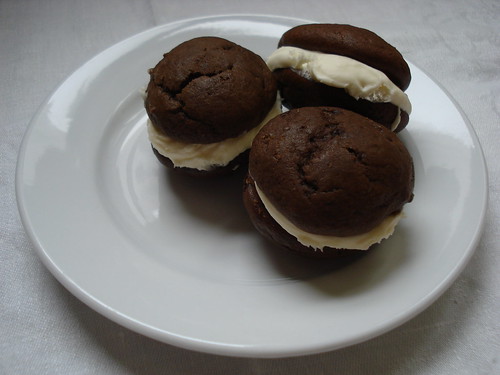
Made small Whoopie Pies for Memorial Day at my cousin's barbeque. I used the small Oxo scoop because last time I made these I used the medium scoop and they were enormous! Way too much of a commitment to eating a Whoopie Pie. These are just the right size!
Wednesday, May 20, 2009
Bead Swap!


I posted a note on the "For the love of beads swap" group on Ravelry to see if anyone wanted to do a straight up trade for size 6/0 beads. One person responded and said she would give me beads but didn't want any back. Isn't that so sweetie? So I said, well, take a look at my blog, I also sew and could send you one of my reversible fabulosity bags or a zippered pouch or an eyeglass pouch. So she sent me beads and I sent her two RF bags and a little chocolate from San Francisco. Fun!
Jar & Knitty Swap!


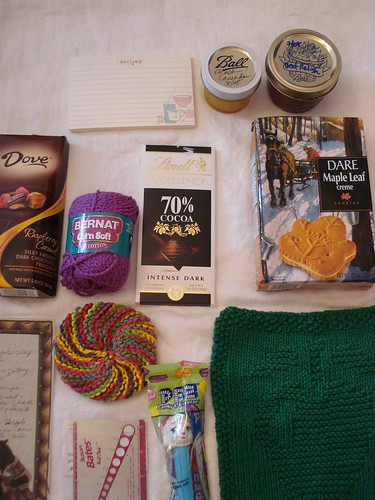
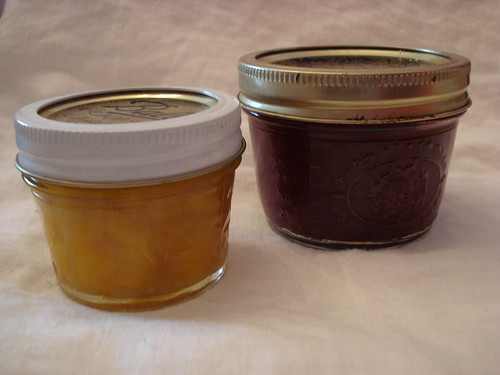
There's a group on Ravelry called Canny Crafters. It's devoted to people who like to make jam, jellies, preserves, pickles, and anything else that can be home canned. I started a thread to see if anyone wanted to swap a jar of their homemade yummy something and something else knitting or crochet related. So there's three of us. Here's what I sent. The jar was actually a little different because I had already foodsavered it. So I took a picture of another jar.
The dots are jam labels (stickers) that I made with my dork machine (sticker maker). I have looked and looked, but it's hard to find 2 inch circular stickers. Paper Source doesn't have any, Avery doesn't make them that size. Avery! It's madness, but actually, I love my homemade 2 inch stickers. I used card stock that I had in my stash. Cut 2 inch circles and then ran them through my dork machine. It's fantastic! I have a little thingy to adapt my rotary cutter to do circles, but I have enough for now. I'll update this post when I receive my end of the swap.
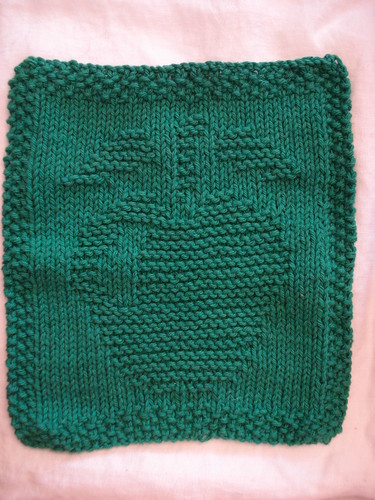
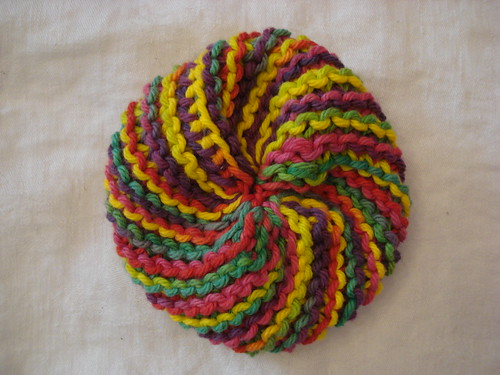
Oooh! Here's the wonderful booty I got in the mail from Dina! She sent me beet relish, peach lavender spread, a knitted dishcloth with an apple on it, a neat scrubby knit round thing, a package of her favorite cookies in the whole world! The cookies are so cute, they're in the shape of leaves! Some lovely raspberry caramel Dove chocolate AND a dark 70% chocolate Lindt bar! Woo hoo! A ball of yarn, a needle gauge, some recipe cards (which I don't have and really needed). and a Sheep Pez! Isn't that fantastic? So cool. I'm also keeping the jars she gave me forever because I don't have anymore of the little quilted crystal ones, and the jar holding the beet relish is one I've never seen here in the City.
Zippered Pouch for Mom


Oh! I forgot to add the zippered pouch that I made for Mom for Mother's Day 2009. The two bags for her shoes, and now she says they're too nice for shoes. Oh well. I just hope she uses them.
Lou Seal Knits!

Here's the bobblehead we're getting at the San Francisco Giants Stitch N Pitch game this year. Isn't it hilarious? I'm so excited about it. I just love it!!! It's the silliest thing I've seen in a long time.
Saturday, May 9, 2009
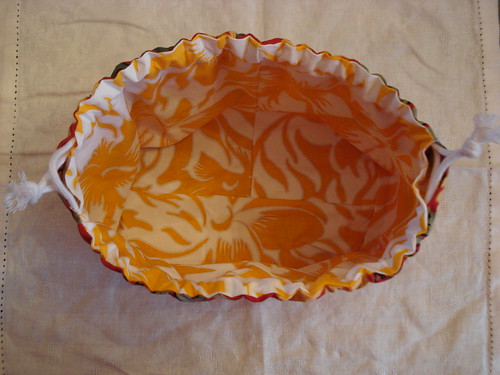
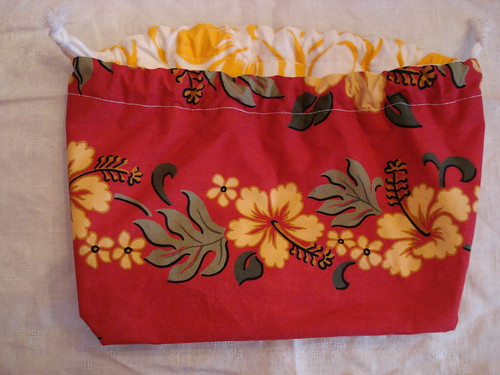
Tutorial: Reversible Fabulosity
Materials:
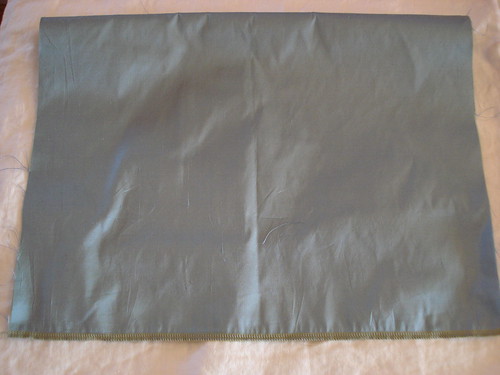
2 fat quarters of material 18" x 22"
thread
sewing machine (I used both my serger and my Bernina)
2 yards of cording
Method:
Each side of the bag will be constructed, then attached to each other, and cording added.
1. Bag Construction (you will make two of these)
Using one of the fabric fat quarters with right sides facing fold the fabric in half so that it is 18" x 11" sew up the side with 18".
Figure 1.
Now fold the fabric in half again, to find the midpoint where the first seam is now in the middle.
Figure 2.
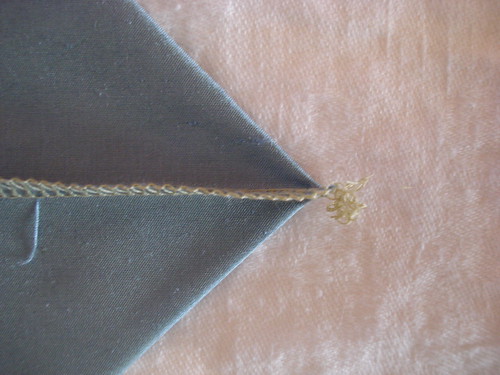
Sew the bottom end
Figure 3.
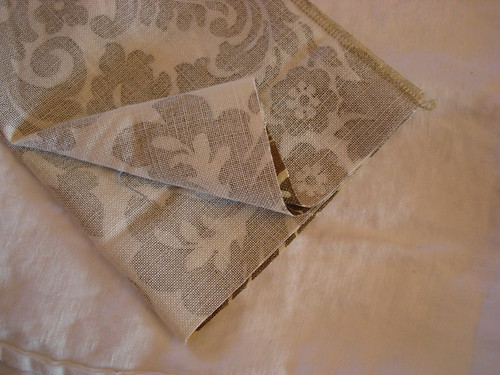
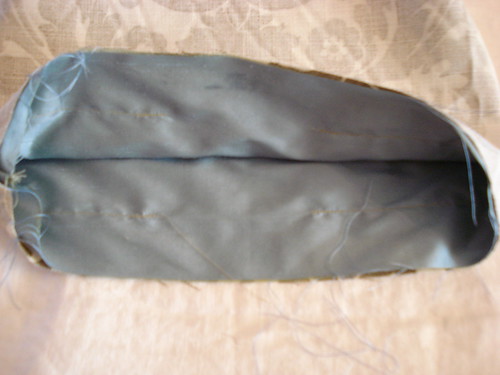
Now, manipulate the bottom seam so it forms a triangle. Make sure it's perfectly pointed or the bottom of the bag won't sit straight.
Figure 4.

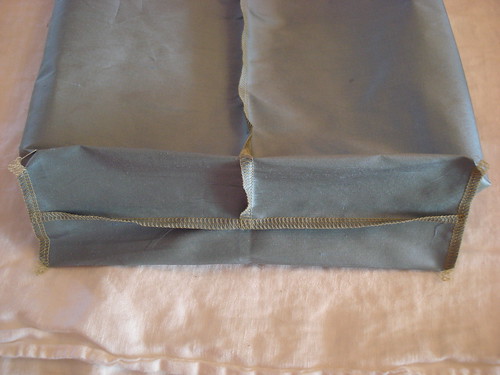
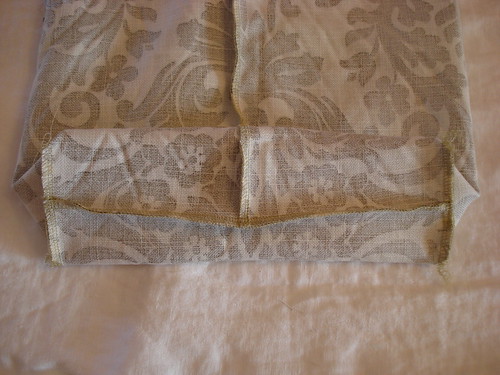
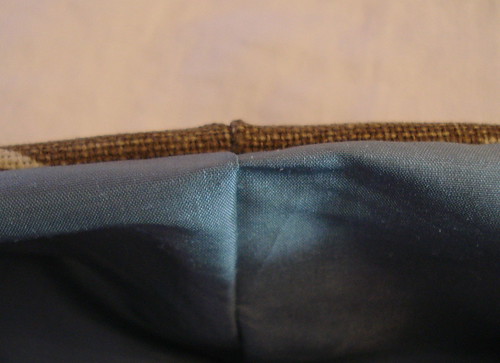
Detail:
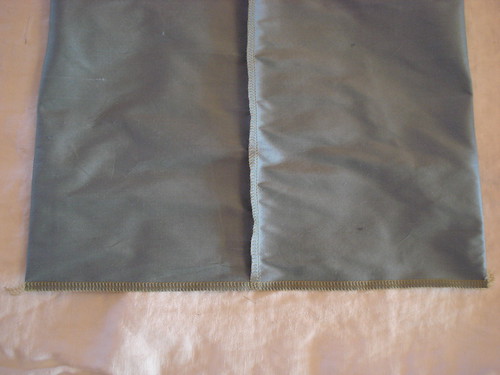
Sew a seam here and repeat on the other side.
Figure 5.
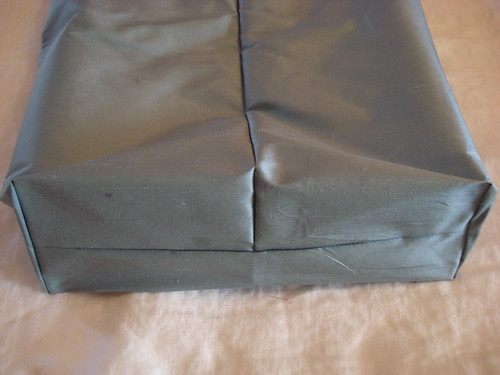
Now you have one side of Reversible Fabulosity. Repeat these steps with the second piece of fabric.
2. Attaching the bags
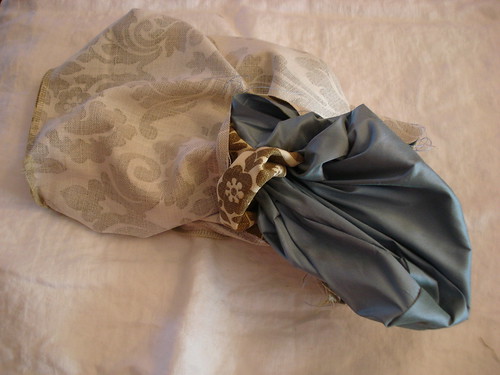
Turn one bag so the right side is on the outside.
Figure 6.
Leave the other bag inside out, with all the seams showing on the outside.
Figure 7.
Put the right side out bag inside the bag with all the seams showing. Now right sides should be facing each other.
Figure 8.
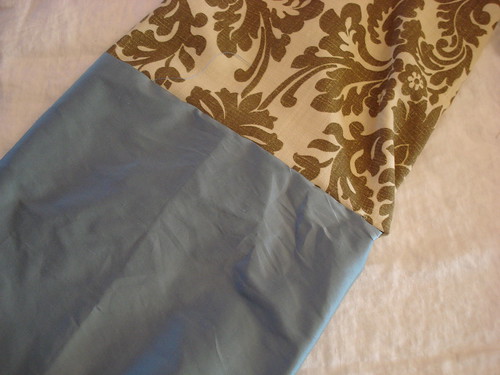
Also make sure the seam on the back of the bag (the first seam sewn) is on the same side for both fabrics.
Figure 9.
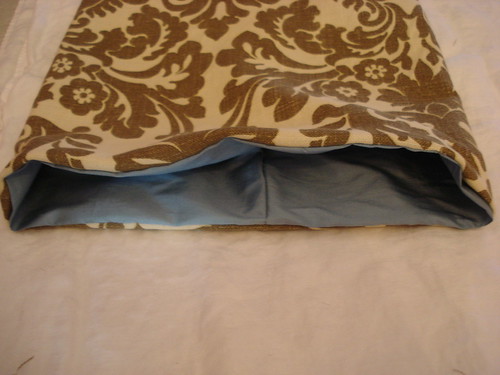
Find the midpoint of each side of the bag. That is, looking at the bag from the top, with the middle seam at 90 degrees, determine the location of zero and 180 degrees. Or looking at the bag from the front, flatten the bag and locate the sides (where the top turns and becomes the bottom). THEN place a pin a distance of 2-3 inches at the halfway point on both sides.
Sew on the INSIDE of the bag 1 1/2 inches from the edge from pin to pin, EXCEPT do not sew between the marked 2-3 inches on both sides. This empty place is for the drawstring and for turning the bag right side out. It's important to sew from the inside, it will give you a better finished seam.
Figure 10.
Turn the bag right side out from the opening. Be careful and go slow. Don't want to rip anything now!
Figure 11.
Now Press! It's important to press here, so that your casing for the drawstring is sewn properly.
Sew on the INSIDE of the bag all the way around using a 1 inch seam allowance. This is your completely lined casing for the drawstring.
Figure 12.
Feed the drawstring into the casing and knot it when it reaches the beginning. Repeat on the other side.
Figure 13. Side A.
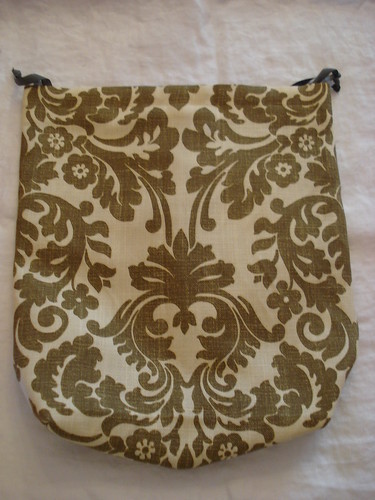
Figure 14. Side B.

2 fat quarters of material 18" x 22"
thread
sewing machine (I used both my serger and my Bernina)
2 yards of cording
Method:
Each side of the bag will be constructed, then attached to each other, and cording added.
1. Bag Construction (you will make two of these)
Using one of the fabric fat quarters with right sides facing fold the fabric in half so that it is 18" x 11" sew up the side with 18".
Figure 1.
Now fold the fabric in half again, to find the midpoint where the first seam is now in the middle.
Figure 2.
Sew the bottom end
Figure 3.
Now, manipulate the bottom seam so it forms a triangle. Make sure it's perfectly pointed or the bottom of the bag won't sit straight.
Figure 4.
Detail:
Sew a seam here and repeat on the other side.
Figure 5.
Now you have one side of Reversible Fabulosity. Repeat these steps with the second piece of fabric.
2. Attaching the bags
Turn one bag so the right side is on the outside.
Figure 6.
Leave the other bag inside out, with all the seams showing on the outside.
Figure 7.
Put the right side out bag inside the bag with all the seams showing. Now right sides should be facing each other.
Figure 8.
Also make sure the seam on the back of the bag (the first seam sewn) is on the same side for both fabrics.
Figure 9.
Find the midpoint of each side of the bag. That is, looking at the bag from the top, with the middle seam at 90 degrees, determine the location of zero and 180 degrees. Or looking at the bag from the front, flatten the bag and locate the sides (where the top turns and becomes the bottom). THEN place a pin a distance of 2-3 inches at the halfway point on both sides.
Sew on the INSIDE of the bag 1 1/2 inches from the edge from pin to pin, EXCEPT do not sew between the marked 2-3 inches on both sides. This empty place is for the drawstring and for turning the bag right side out. It's important to sew from the inside, it will give you a better finished seam.
Figure 10.
Turn the bag right side out from the opening. Be careful and go slow. Don't want to rip anything now!
Figure 11.
Now Press! It's important to press here, so that your casing for the drawstring is sewn properly.
Sew on the INSIDE of the bag all the way around using a 1 inch seam allowance. This is your completely lined casing for the drawstring.
Figure 12.
Feed the drawstring into the casing and knot it when it reaches the beginning. Repeat on the other side.
Figure 13. Side A.
Figure 14. Side B.
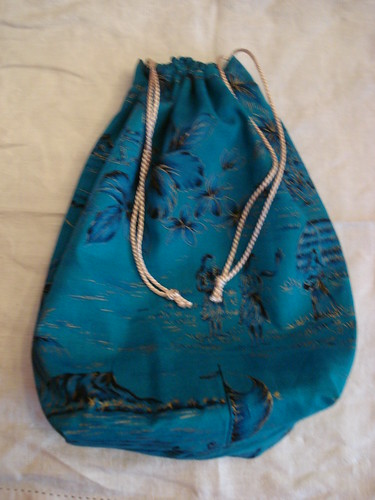
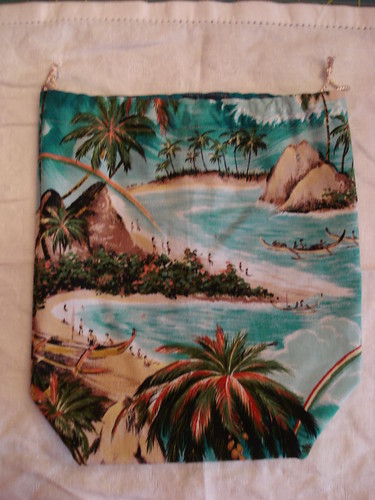
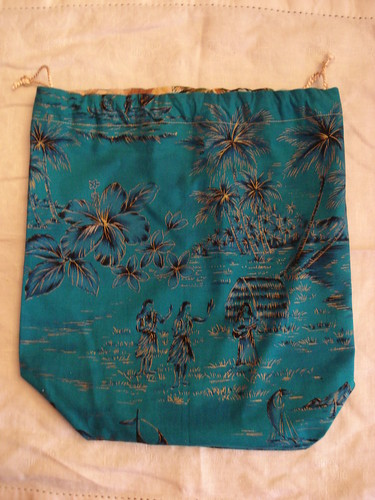
Friday, May 8, 2009
More Reversible Fabulosity!
Can you believe that I sent five of these to Keani and the girls but didn't take any pictures? What the what?! Yeah, whatever! Here are some that I've made since, and I love them. I'm using them for project bags, to hold yarn, for a purse, and I'm going to use them when I travel to help separate my stuff, but keep it organized.

Thursday, May 7, 2009
More Stitch Marker Madness!
I can't stop making these! I love them so much! Jewelry for knitting. I wish more of my friends or sisters were knitters. Everyone keeps saying, it's too hard. Why do people think that if you take up knitting it should be automatic! It takes a little time to get it. I just don't understand the impatience. I told my friend, that I didn't understand why she thought it should be instantaneous that she's so good at knitting. Is there anything that anyone has ever done that they're good at, that they're accomplished and have a developed skill for that came so easily, so quickly? Nothing! If you want to be good at something, you have to practice. Ugh. It's exhausting talking to people about this sometimes. Maybe they just don't want to knit. Aww, that can't be it! ;-}
Here's some with beads that Beth bought for me at Stitches West.
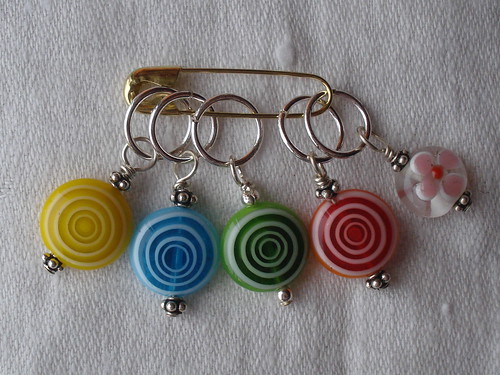
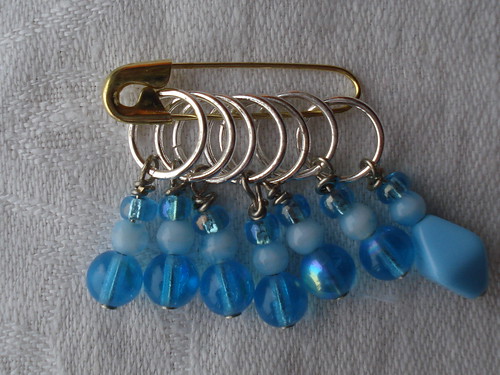

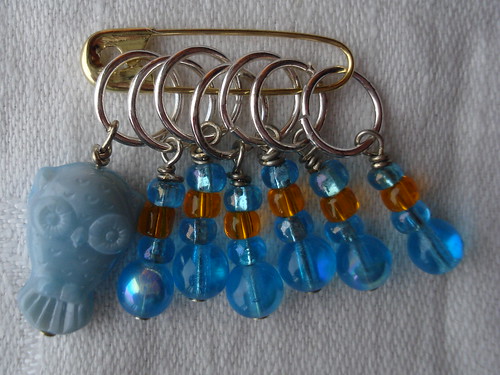
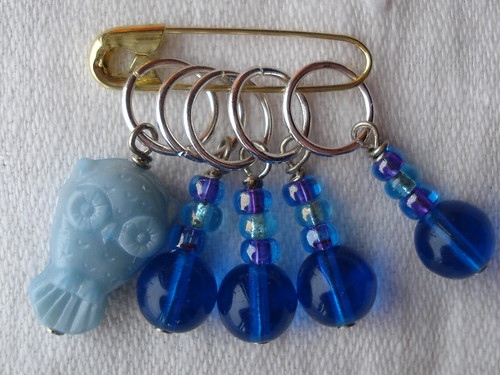
Here's some with beads that Beth bought for me at Stitches West.
Subscribe to:
Posts (Atom)
